Home- AZ Sign Shop.com, Arizona Sign Shop Estimates- AZ Sign Shop.com , Arizona Sign Shop Help- AZ Sign Shop.com, Arizona Sign Shop, Flagstaff Sign Shop Shopping Cart, AZ Sign Shop.com, Arizona Sign Shop, Flagstaff Sign Shop
pop up description layer
note: If you have any questions that are not covered, please feel free to Contact Us by email or by phone.


TIPS ON PLACING YOUR ORDER

SPECIFY:
REQUESTED COLOR IN SPECIAL INSTRUCTIONS.

FILES:
IF you have an image to upload, use the upload file browse button to browse for your image. For files over 5 Mb call after an order is placed for details. Files up to 5 Mb may take 10 minutes or more to upload depending on your Internet speed.

DESIGN:
We will design your layout for FREE. Just type your text into the special instructions box and send us a logo or picture and we will create your design.

PROOF:
You will receive a proof in your email within 24-48 hours of order placement, during business hours.


Material Guide

PolyMetal Poly Metal Signs are extremely durable and long lasting sign material. The Signs are .020 aluminum on both sides of a High Density Plastic core. Superior to Aluminum signs and the perfect replacement to a Plywood sign. The material can be screwed on to any surface or be used as a free standing sign with posts. If you are looking for an very long term outdoor sign, choose Polymetal. Its the same price as Aluminum and Plywood signs with superior qualities.

Aluminum Aluminum signs are the most durable and long lasting sign material. Our aluminum signs are .040 or .080 thick. Rounded corners can be added for safety.

Corrugated Plastic An economical choice for indoor or outdoor advertising. Very durable and lightweight. Compatible with wire stakes and metal frames, and can also be grommetted to be hung as rider panels.

Banner Great for distance visibility for advertising your event, home for sale, parties and more. Material is 13oz or 16oz, hemmed and grommeted.

Magnetics The easiest and most affordable way to advertise using your mobile billboard(read: vehicle). Advertise your business during the day, and then take them off when using your vehicle for personal use.

Decals Decals are made of adhesive vinyl that is digitally printed in full color with an UV over laminate for that extra protection. Decals can be as small as a bumper sticker or as large as 44" wide. used for advertising in your windows or on your vehicle, and can be applied to any smooth surface.

Bumper Stickers A great way to get your word out. Made of durable adhesive vinyl.
Digital Vs. Screen Printing.

Digitally Printed Signage is superior to screen printing in many respects. Digitally printed signs can be made in full color, won't crack, are very durable and long lasting. They can be printed as short runs and "one-ofs" (no minimums),no word count restrictions, no font style or size restrictions. They have increased registration & accuracy for repeat orders, the highest photographic reproduction, in full color. Small lines and images reproduce without distortion, edge fuzzing and bleeding. All orders are tailored to your specifications.

Screen printing is the most affordable & economical sign product when orders of 100 or more are needed. They are great for simple text/ line art signage. Placement/Registration is not as exacting as digitally made signs, but since most signs are viewed at a distance, any discrepancies are not obvious. Upto 20 words are included in most estimates, depending on fonts size and word count, additonal words may be charged.

So Why Digital? Simply put, digital is just more efficient. It has fast turnaround, photographic quality, no quantity restrictions, no word limits, no layout fees, no color, font, or size restrictions, PMS color matching, it's durable, long life, full CMYK colors, color management abilities, highest resolutions and color repeatability... perfect for runs of 100 or less.


How to apply a vinyl sign.

"How do I apply a vinyl sign?" you might be asking yourself when you get your order from AZ Sign Shop. Well, we have decided to create a simple, picture by picture explanation of how to do it. Just click on the first picture to get started, and if you have any other questions, feel free to Contact Us


Even More Detailed Vinyl Wet Application Instructions! So, it seems that even having pretty pictures isn't enough, so we at AZ Sign Shop decided to give you, yes you, the lucky customer, even more detailed instructions on how to "wet" apply a vinyl to a sign!

Vinyl Application Instructions (NEW) 4/6/08

(For Professional results, you will need two people for installation)

Clean your surface well with rubbing alcohol (use warm soapy water for dirty areas)

"WET APPLICATION METHOD" (application mixture: mix 1 to 2 drops of dishwashing detergent into a cup of warm water. Place into a small spray bottle, shake well.)

1. (Photo #1) Measure area and position your vinyl image onto your surface, with a strip of masking tape, creating a "hinge" on the top or side of your vinyl

2. (Photo #2) Lift your vinyl graphic up toward the "hinge tape". Lightly mist the surface (ie window, vehicle, sign material) with the application mixture. Remove the paper backing from your vinyl, exposing the adhesive side and lightly mist with the application mixture. Tip: a little of the application liquid goes a long way.)

3. Using the side of your palm, lightly press the vinyl graphic onto the surface, starting at the hinge, working toward bottom or side

4. (Photo #3) Remove the masking tape hinge. Place the squeegee -roughly at a 45 degree angle, from the surface using light to moderate pressure, starting at the center and with short, overlapping strokes working toward the edges, slowly move the air and liquid to the edge of your vinyl graphic, always pull never push your squeegee.

5. After you have completed this step, rub your fingers across each letter. If large bubbles are detected, work out what you can with your squeegee, if there are still bubbles no problems, they will be taken care of at a later time.

6. Wait 15 to 20 minutes then remove the top transfer paper. (Note: before removing the top transfer paper, lightly burnish the vinyl with a cloth wrapped around your finger.)

7. (Photo #4) To remove the top transfer paper, start at the right top or bottom side , at a 180 degree angle, slowly folding the transfer paper onto itself. Note: It is very important that all of your vinyl has firmly attached to your surface, if any of the vinyl comes away from the surface, replace the transfer paper over that area and using the squeegee, re-apply area that has not adhered, wait an additional 5 minutes before proceeding. (Tip: if you find that the surface under the vinyl has too much liquid on it, blot off the surface and the vinyl, with a paper towel.)

Dry Application Instructions
Wet application method for vinyl is preferred even by the experienced installer, because it goes on faster and easier, however, dry application is preferred for tiny letters under 3/4" in height or on compound curves or textured surfaces.

For Dry Application, follow the Wet Application instructions, except do not use any application liquid

The main difference between an experienced and novice installer is generally ONLY the amount of time it takes to apply the vinyl.

VINYL REMOVAL

If you have vinyl that needs to be removed before installing NEW vinyl

1. Purchase plastic razor blades at any home improvement store or use the edge of a plastic credit card. 2. Purchase a commercial citrus vinyl remover 3. Heat up the old vinyl with a hair dryer or heat gun on low and using the plastic razor, slowly lift up the edges. 4. To remove the glue residue, use a commercial removal product. Read and follow the product instructions and make sure it is recommended for your surface and always use these products in a ventilated area.

Tools & Supplies needed for installation

Rubbing alcohol, dish detergent & warm water for application fluid, small spray bottle, paper towels, sewing needle or exacto knife for removing bubbles, squeegee for application, masking tape for "Hinge", Vinyl Image/lettering, a heat gun or hair dryer to assist in difficult application problems, and a friend to help with installation. Possibly beer too, but that's optional.

There are also commercial application fluids that you can purchase.

CAUTION: Install your vinyl immediately after receiving it in the mail. The longer you allow the top transfer paper to remain on the vinyl, the more difficult it will be to install your vinyl. Store your vinyl at inside temp of 68-75 degrees.

Clean your surface and area around to remove dust, dirt and moisture. Make sure your installation area is well ventilated and well lighted.

Your vinyl will be completely cured in about 24 to 48 hours. It may take 2 to 3 months for vinyl to completely off gas and the tiny bubbles completely disappear. We recommend waiting 48 hours before washing or waxing your vehicle and or windows.

NOTE: DO NOT USE Windex or other commercial brand cleaning products, to clean your surface, as these products will interfere with the adhesion process. If you use commercial cleaning products to prep your surface, rinse well with water and follow-up with rubbing alcohol then dry with a soft paper towel.

Sign Codes: Permits, Regulations.

Customer Responsibility:

RealEstate Signs, Most temporary window signage, Temporary Banners, signage used indoors, city and municipality required signs (i.e tow signs), Poster etc, generally do not need a permit. Customers are responsible for obtaining all necessary permits relating to temporary & permanent signage. Contact your local permit department prior to purchasing signage if you have any concerns.

We build custom signs & banners to our customers specifications & by placing an order, the customer acknowledges that they have read and understand their local sign ordinances and codes and will take full responsibility in obtaining any necessary permits from their local agencies.

Housing associations, landlord& management companies can also provide you with rules and regulations regarding signage in your area.

Measurement Conversion Sheet! our measurement chart

The chart above is designed to help you, the customer understand a few things about sign making. Essentially, the chart shows you how big your letters need to be for the maximum readable distance. Also, color combinations will cause distances to vary approximately 10%, and the above measurements are set for red or black letters on a white background.

Magnetic Sign Care
Magnets are a great way to advertise a business. They can turn any vehicle into a company fleet vehicle, however, there are certain care tips and tricks that should be followed for proper sign and vehicle care.

Storing Magnets

When you are not using your magnets, store them on a refrigerator, file cabinet, washer, dryer, or other metal surface. Never keep your signs in your trunk or place them in a truck bed.Always protect them from inclement weather. Never roll your magnets. Avoid placing objects on top of the magnets, and do not stack magnets with magnetic sides facing each other.

Preparing your surface:

Clean your surface well with a mild detergent or alcohol. Wipe with a soft cloth and allow to dry. If your car has be painted recently, the paint will need to cure for 90 days. If a vehicle has been repaired with a bondo material, the magnet will not adhere to the surface. If you are unsure, check the area of your car with a refrigerator magnet. If it sticks, you can use a vehicle magnet!

Application of your magnetic sign:

Only apply your magnet to a flat surface. Try to avoid curves, as this will mess up the adhering ability of the magnet. Make sure there are no air pockets either. If you have placed your magnet in the wrong position, completely remove it and replace it, never slide the magnet into position, because if there is dust or other materials below the sign, this will scratch your car. Also, avoid placing your magnet on parts of the vehicle that can reach 150 degrees Fahrenheit.
Be aware that long term use may damage your paint's surface, especially in areas that are frequently exposed to sunlight. This can result in fading of the surface.

Cleaning

Remove and clean your magnet and your vehicle surface regularly. We recommend using a mild detergent or alcohol (not beer).

If you follow these instructions, you will be able to enjoy your product for a long time without problems.

However, a better choice would be permanent vinyl lettering. Permanent vinyl lettering is by far the best choice for durability and longevity. Your image can be reproduced in full digital color and will give you many years of use, without worrying about paint discoloration.

AZ Sign Shop AZ Sign Shop AZ Sign Shop
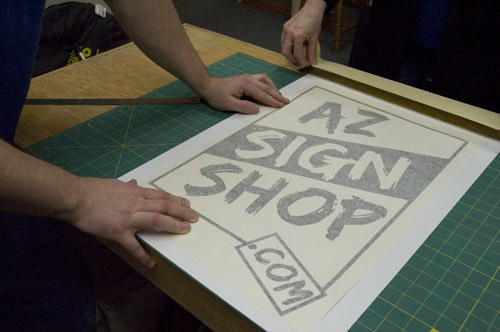
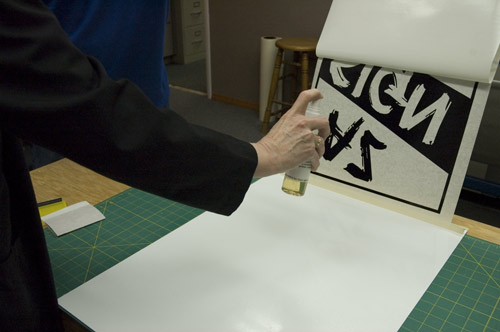
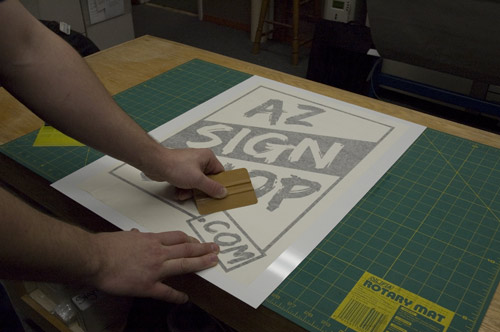
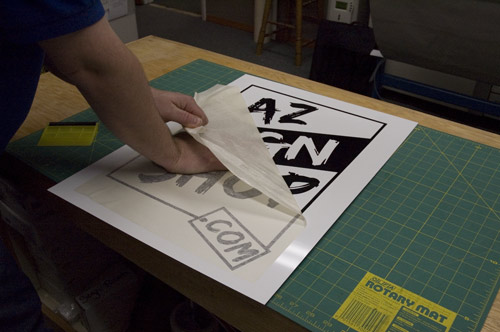
 Why use AZ Sign Shop?
 
With AZSignShop.com, no more running from shop to shop getting estimates. Our site allows you to conveniently browse, get estimates, and purchase from the comfort of your chair 24/7. Not able to find what you need? Have questions? Contact one of our design specialists Monday through Friday, 9 a.m. to 5 p.m. MST or send us an e-mail. We will respond during our hours of operation.

Dedicated staff, superior quality and fast
turnaround are just a few reasons to use
AZSignShop.com.

We use state-of-the-art equipment and high
quality, name brand materials to produce your
superior quality signs.


AZ Sign Shop Guarantee

If you are not completely satisfied with your sign,
let us know and we will make it right.
 
   
Help
File Preparation
Help Center
F.A.Q.
Site Map
Company
Overview
Press Release
Testimonials
Job Openings
Policies
Privacy
Turnaround
Shipping
Terms & Conditions
AZ Sign Shop
Contact Us
Directions
About Us


OUR MAIL BOX:
(Address Only for Payments and Mail)

AZ Sign Shop.com
2700 S. Woodlands Village Blvd. Suite 300-191.
Flagstaff, Arizona 86001